

 Then I rolled it up into a ring on the broom handle, stuck a shovel through the bottom of the ring and started twisting.

 We filled up a bucket with the wood. It was more than I needed, but why make two trips?
 I sewed the hide into a "bag" and then lashed some sticks together to make a tripod. Dug a small hole in the ground and put the tripod over it. While I was doing all this I had a fire going to some coals ready. Then, I tied the bag to the tripod, filled the hole with coals, put punky wood on top of the coals, and then draped the hide over the hole.
 Once the inside was sufficiently smoked, I turned the bag inside out and completed the other side.
Now I've got a finished bit of buckskin. Now let's go over why this hide turned out pretty crappy, step by step.
First step: Skinning - The people who did the skinning really did not have hide preservation in mind while they did this. There was quite a bit of good deer skin left because they were only focused on getting the meat and head. Skinning an animal is something I feel that should always be done with care and respect. You KILLED an animal, please have the respect not to hack it to pieces blindly. Try to make as much use of it as you can. I'm not trying to badmouth the people who killed and skinned this deer. In fact, I greatly appreciate the skin and meat I get from them every year. I just wish people in general had a greater respect for animals.
Second Step: Storage - This hide was stored in a freezer for 1 year without being fleshed. This caused some of the meat to become so stuck to the skin that they would not separate and I had to lose some more of the hide. It also caused some grease burns because of the fat that was left on. Always flesh a hide first thing. This will save you from the two problems I just mentioned and, fleshing is just way easier when the skin is fresh off the animal.
Third Step: Fleshing - During this step I put far too many score marks into the hide. Why? Impatience. One of my biggest problems. I just wanted to get it over with and I did not take my time. Looking at it now I see that I have fallen into the category of people not respecting the animal. Luckily none these scores led to a loss of hide, but they easily could have. They certainly make for a less uniform piece of buckskin.
Fourth Step: De-hairing - I could have definitely let the hide soak a little longer. I pulled it out too soon and while most of the hair came out, there was a large tuft around the neck area that was still held fast. I later had too much trouble scraping that part of the hide to get the hair out and had to lose some hide. Again, my impatience has resulted in lower quality buckskin.
Fifth Step: Stretching - I decided, during this step, not to cut slits all around the hide before racking it to save time. Instead, I would just cut each slit as I felt I needed it while racking. What ended up happening? As the hide got tighter and tighter on the rack it became difficult not to cut the slit way too big. I also cut the bare minimum number of slits to get it stretched out and therefore didn't stretch it nearly as much as I could have, making more difficult to scrape. My impatience has bested me again.
Sixth Step: Scraping - I must say that I did a much better job in this step than on my last hide...in main part of the hide anyway. I skimped out quite a bit around the edges and near holes. I also should have made more time to keep my scraper sharp. I again just wanted to get the job done and have buckskin instantly. Are you started to see a pattern here of the lack of a certain virtue causing problems?
Seventh Step: Braining - This is a fairly simple step...I think it went well.
Eighth Step: Wringing - If you take a close look at the picture for this step, you'll notice that some of the edges are loose and not really getting in on the wringing process. Because this really drives the oils from the brains (or eggs) into the hide, I now have a piece of buckskin with hard unusable edges. Also, the set-up I used for this step was very poorly planned. A broomstick and a shovel? What was I thinking? Also, you can't see this, but I picked a spot that was way too high up and during the entire wringing process I was standing on a chair. IMPATIENCE!
Ninth Step: Pulling - I think I did alright with this. I took my time, got into a groove and didn't really get impatient. At first I thought that the edges being hard were because I didn't spend enough time stretching them while they were drying. However, I think now that they are hard because of what I described in the wringing step.
Tenth Step: Smoking - I did not take the time to make a skirt for the hide, so parts of it aren't nearly as dark as the rest. I also chose to start this process when I didn't have time to really finish it, so my buckskin is not uniform or nearly as dark as I would like it. Impatience again.
So what has all this taught me?
Patience Patience Patience
When making buckskin, the hide does not give a crap about your schedule. You MUST listen to the hide. The hide WILL NOT be rushed. Take care and pride in all things you do.
I hope these lessons stick with me.


 Next I started making the main frame by sticking the saplings into the ground at an angle so that they wouldn't pop out, Bending them to meet each other and lashing them together.
 What I have so far is the main support sapplings creating the dome shape.
 What I plan on doing next is lacing the whole thing with smaller branches, leaving a doorway, and then spackling the whole thing with "survival cement".
  Once I had it de-haired I started tying it to the rack to stretch and dry it.
 Now I just have to wait for it to dry.
 We also tried to break some rock and make discoidal knives...not much luck there though.
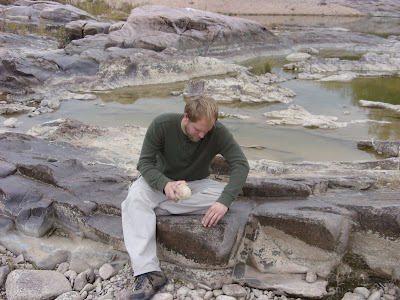
 Where I live and where I grew up, there are literally NO rocks. So my knapping skills are really really lacking. I guy named Bill Metcalf teaches knapping in Killeen, Tx, which is several hours from where I live, but I hope to go and learn from him sometime soon.
 I made some nice hand-drill stalks from yucca, but they mysteriously dissappeared when all the children started showing up. Oh well.
 I've always had good luck with Gerber knives and it was only $34.99, so I figured I'd give it a try. I'll take it to the woods tomorrow and try it out. Hopefully I'll return with my opinion of Gerber intact.
 I used to have a Gerber knife that I would love to recommend, but I can't seem to even find a picture of it online. I suppose they discontinued the model and I don't remember the name of it. It lasted me years and only cost about 20 dollars or so. Hopefully in the somewhat near future I'll be able to buy
  I'm only partially proud of this rack. I used wing nuts to bolt it together, so it's very easy to take apart and transport. What I don't like about it is that it's not quite sturdy enough. I would like to build another one with something thicker than 2x4's. Anyway, when I picked up the rack, my girlfriend's dad also gave me a deer hide to work on.
 Once I got the hide thawed out, I brought out all my tanning tools.
 The deer (as usual) was poorly skinned, so I had a lot of fleshing to do. I bought this fleshing knife from Gander Mountain for under 10 dollars I think. It works really well.
 I have a fairly nice fleshing beam that I made from a section of large pvc pipe, but I left it at my friend
  and after
 Now the hide is soaking in a bucket of water and dish soap to loosen the hair. I'll continue posting this project as I go.
 The rest of the time I tried to focus on expanding my hearing. I tried to pick out as many different sounds as I could hear and identify them. Of course I heard cars, sirens, a couple planes and dogs barking in the neighborhood, but I also heard a breeze blowing through dead leaves in a tree, leaves falling through the branches of other trees, one possibly two bird calls I couldn't identify and some type of woodpecker. I hope to hone my sound awareness and knowledge base to the point of not only being able to accurately identify the sounds I heard but also to hear all the sounds I'm sure I didn't notice.


 This is the trail leading toward the sit spot. There is also a lot of Black Berry growing nearby.


